Creating and Managing Invoices
Invoicing shouldn’t take all afternoon. With MiniCRM, you stop creating manual documents and start sending compliant, professional invoices that track themselves.
Here is how to turn a “Deal Won” into money in the bank.
What You’ll Do
- Start the invoice from the customer card.
- Verify compliance details (dates, tax IDs).
- Add your line items and check the total.
- Issue and Send to the client.
Quick Start Guide
Step 1: Start the Invoice (Context is King)
Don’t navigate away. You are likely already looking at the customer you want to bill.
- Open the Contact or Deal card of the customer.
- Click the New Card button.
- Select New Invoice or New Proforma.

Pro Tip: Doing it this way means MiniCRM automatically pulls the customer’s data into the document. No typing errors, no copy-pasting.
Note on Numbering: MiniCRM automatically assigns series and numbers to invoices, offers, and proformas. These sequences are managed by the system to ensure compliance and cannot be modified manually.
Step 2: The Compliance Check (Dates & Details)
EU regulations are strict. MiniCRM ensures you don’t miss a required field.
- Check the Buyer: Ensure the address and Tax/VAT ID are filled in. If missing, click Edit next to their name to fix it permanently.
- Dates: Set the Issue Date (usually today) and the Due Date (e.g., 8 or 14 days).
- Payment Method: Choose Bank Transfer, Card, etc.
- Document Name: You can rename the invoice card for better internal tracking by clicking directly on the auto-generated name at the top of the card.
Step 3: Add Your Line Items
What are you charging for?
- Click Add Item (or start typing in the first line).
- Existing Item: Select the service or product from the list (price auto-fills).
- New Item: Type it out, add the price and VAT rate. The system will save it for next time.
- Check the Total: The system calculates the VAT and Gross total instantly.
Step 4: Issue and Send
A draft is just a draft. To make it legal and payable, you must Issue it.
- Click the Issue button.
- Select Issue and Send to Client.
- Confirm.
Crucial Concept: Once you click “Issue,” the document is locked. It is now a legal financial document with a unique number. It cannot be edited anymore.
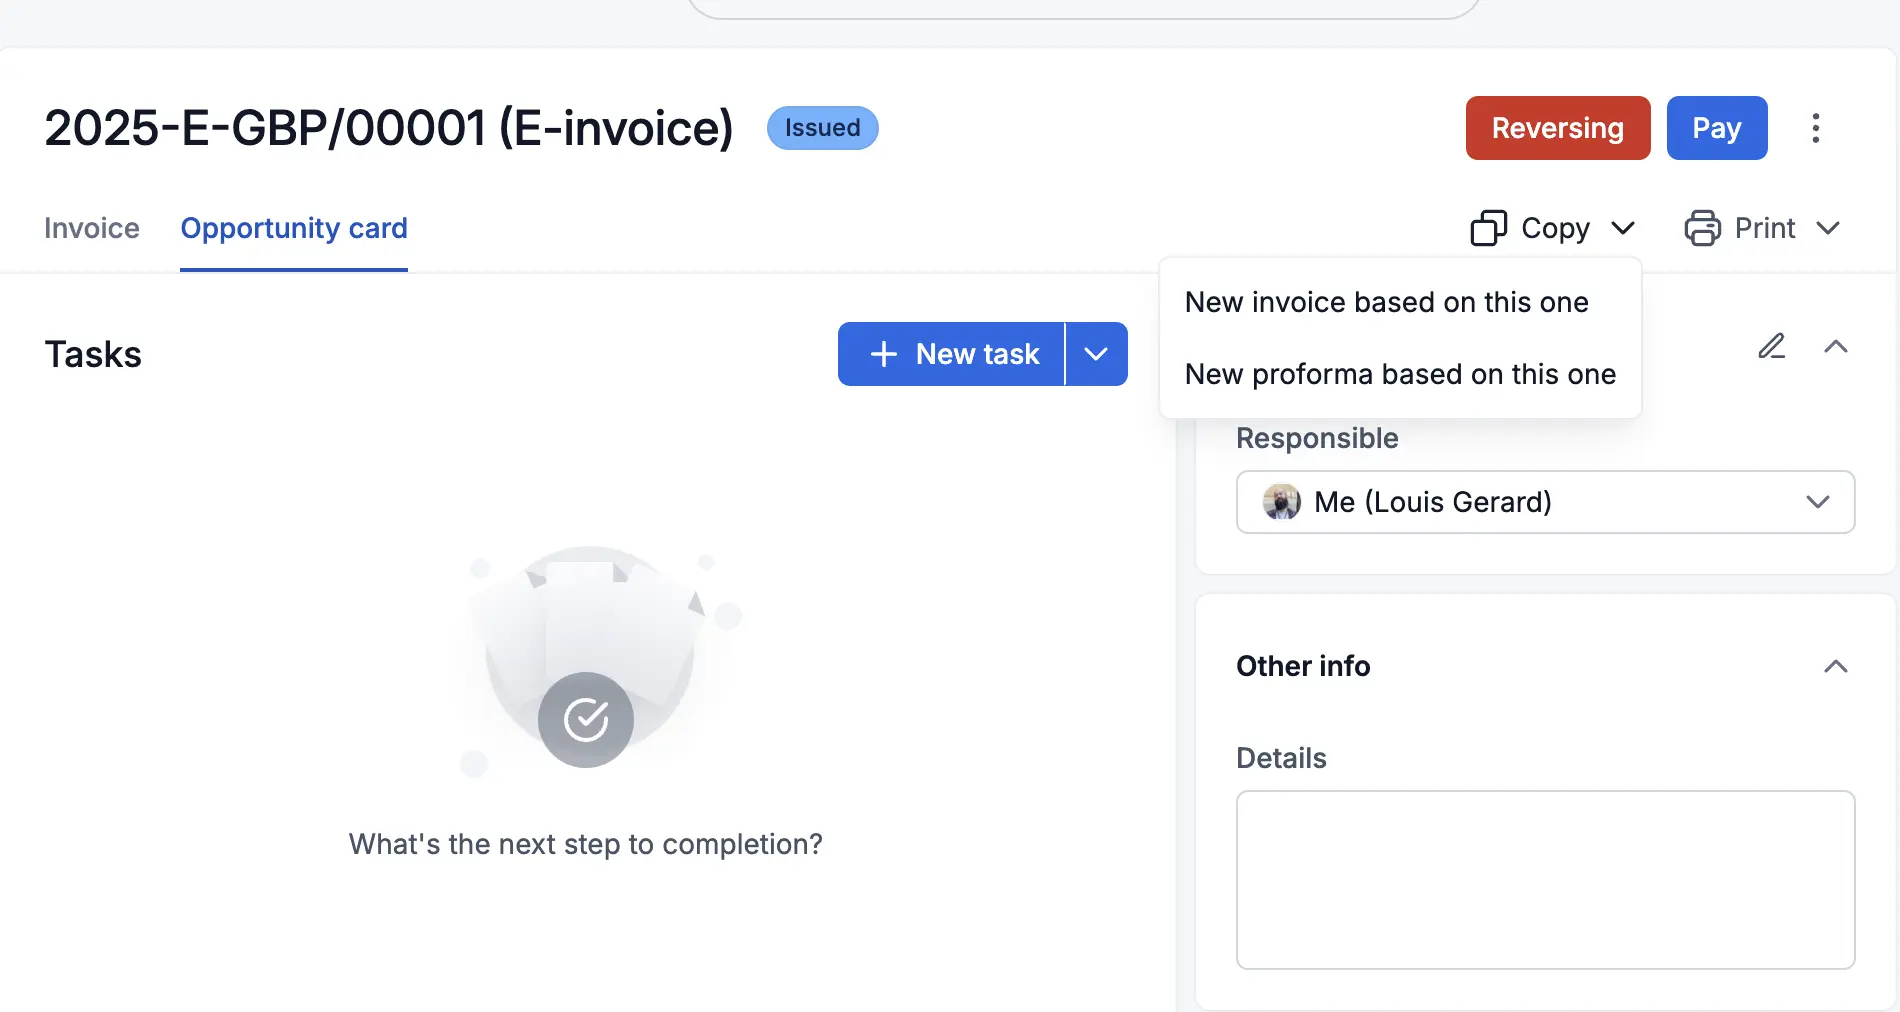
Duplicating Past Invoices (The “Copy” Feature)
If you need to issue a new invoice that is nearly identical to one you’ve sent in the past, you don’t have to start from scratch.
- Open the existing invoice you wish to replicate.
- Click the Copy button located in the top right corner of the card.
- Result: A new draft is created with all the items and customer details pre-filled. You only need to verify the dates before issuing.
Proforma Invoices
Proformas allow you to request payment without generating a tax liability immediately.
- Create: Select New Proforma from the customer card.
- Issue: Follow the same steps as a standard invoice.
- Convert to Fiscal Invoice: Once the client pays, open the Proforma and click Mark as Paid. The system will automatically ask if you want to generate the final Fiscal Invoice.
- Reversal: If a Proforma is no longer needed, use the Reverse button to void it.
Recurring Invoices (Automation)
If you have a subscription or retainer model, you can automate your billing.
- Activation: Open the “origin” invoice you want to repeat. Click the Recurrence toggle (it will turn green when active).
- Frequency: Invoices are generated automatically every month on the same day as the original activation. If that day falls on a weekend, the system issues it on the next business day.
- Management: Click the green recurrence button to view all linked invoices or to Stop Recurrence.
Bulk Product & Service Import
To speed up invoicing, you can import your entire product list. This requires Administrator rights.
- Go to the Invoice or Orders module.
- Click the arrow next to the module name and select Stock (Stoc).
- Click the arrow next to “New Item” and select Import.
- File Specifications: Your file must include: Name, Type (Product/Service), Unit (pcs, hours, etc.), Product Group, Currency, and VAT rate.
- Validation: Ensure the units and currencies in your file match the existing settings in MiniCRM to avoid errors.
Special Scenarios
- My business is VAT Exempt
- Go to Settings (Gear icon) > Products > Invoicing.
- Uncheck “My company is VAT registered”.
- Your invoices will now default to 0% VAT.
-
The Client Paid in Cash If the payment method is “Cash”, a Generate Receipt (Chitanță) button appears after issuing. Click it to create the official legal receipt.
- Link Forms: You can insert special links in your email templates. When a client clicks them (e.g., “Accept Quote”), the status of the invoice or offer card updates automatically in your CRM.
Handling Mistakes
- Drafts: Click the three dots (⋮) and select Move to Trash.
- Issued Documents: Use the Reverse button. This creates a negative (storno) invoice to legally balance your books. In some regions, this will show a negative quantity with a positive price to comply with local e-Invoicing (e.g., RO e-Factura) standards.
FAQs
- Does MiniCRM handle the invoice numbering? Yes, automatically. You cannot skip or duplicate numbers.
- Can I edit an invoice after I Issue it? No. Once issued, it is a locked legal document.
- How do I handle recurring billing? Activate the toggle on a base invoice; the system handles the rest monthly.