
Import Your Data in 5 Minutes
Ready to go?
See how it works (1‑minute overview). Read the full guide for special cases.
You can do this, even if you’ve never used a CRM before. No technical skills needed. We’ll guide you through everything.
What You’ll Do
- Open your Excel or CSV.
- Upload it to MiniCRM.
- Match your columns to fields (mapping).
- Confirm, and you’re done.
Quick Start Guide
Step 1: Grab a Sample Export
Export one Excel from the MiniCRM product you’ll import into. If the product is brand new, create one test record first, then export.
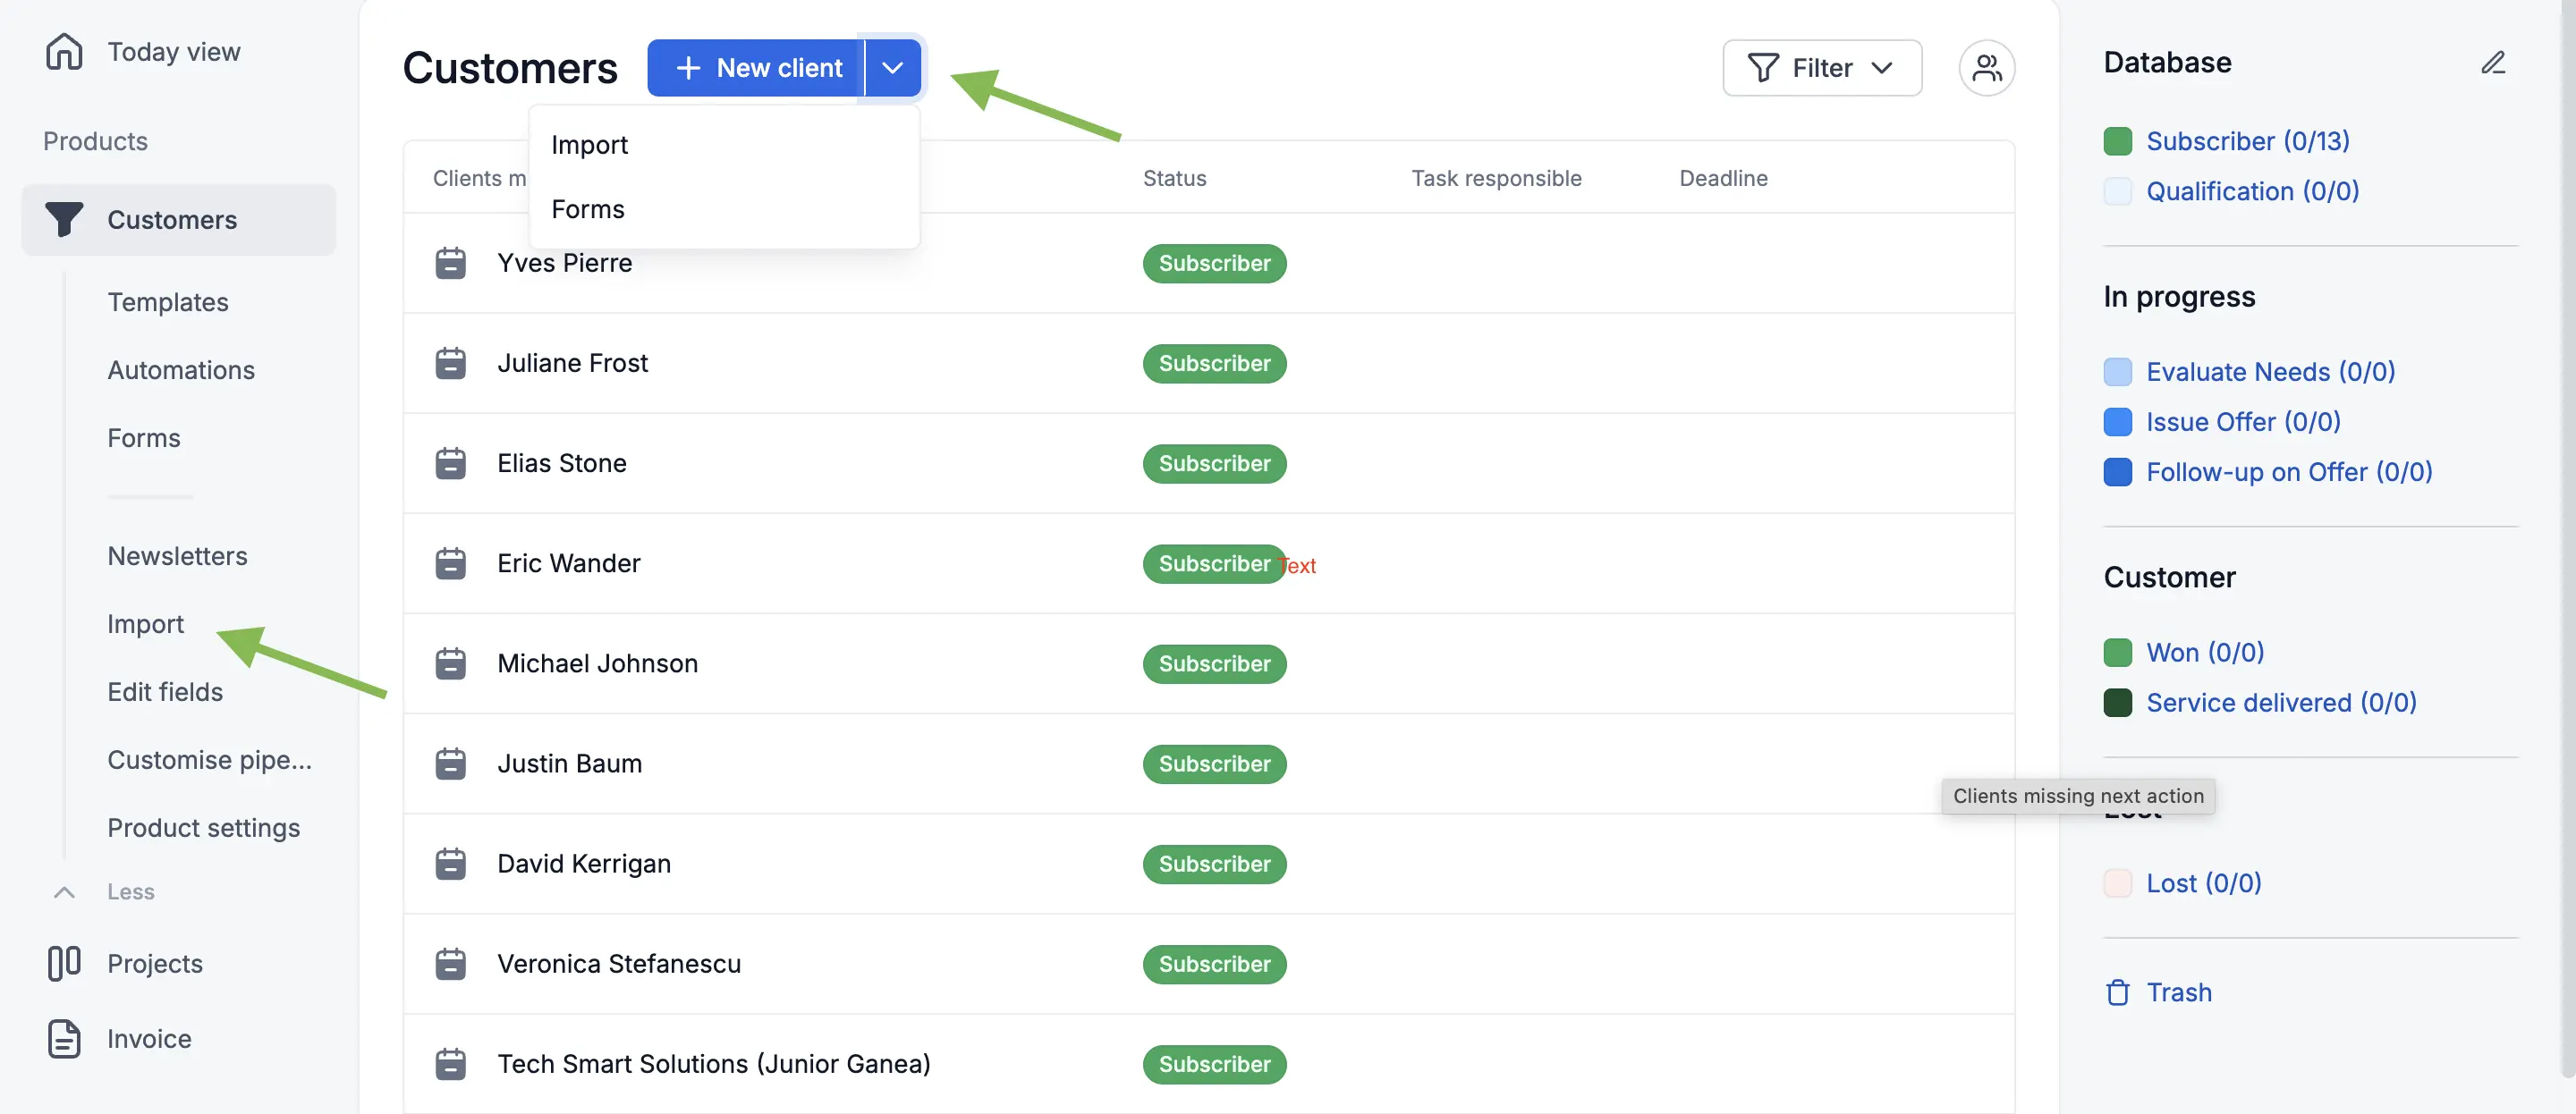
This gives you the right headers so mapping is easy.
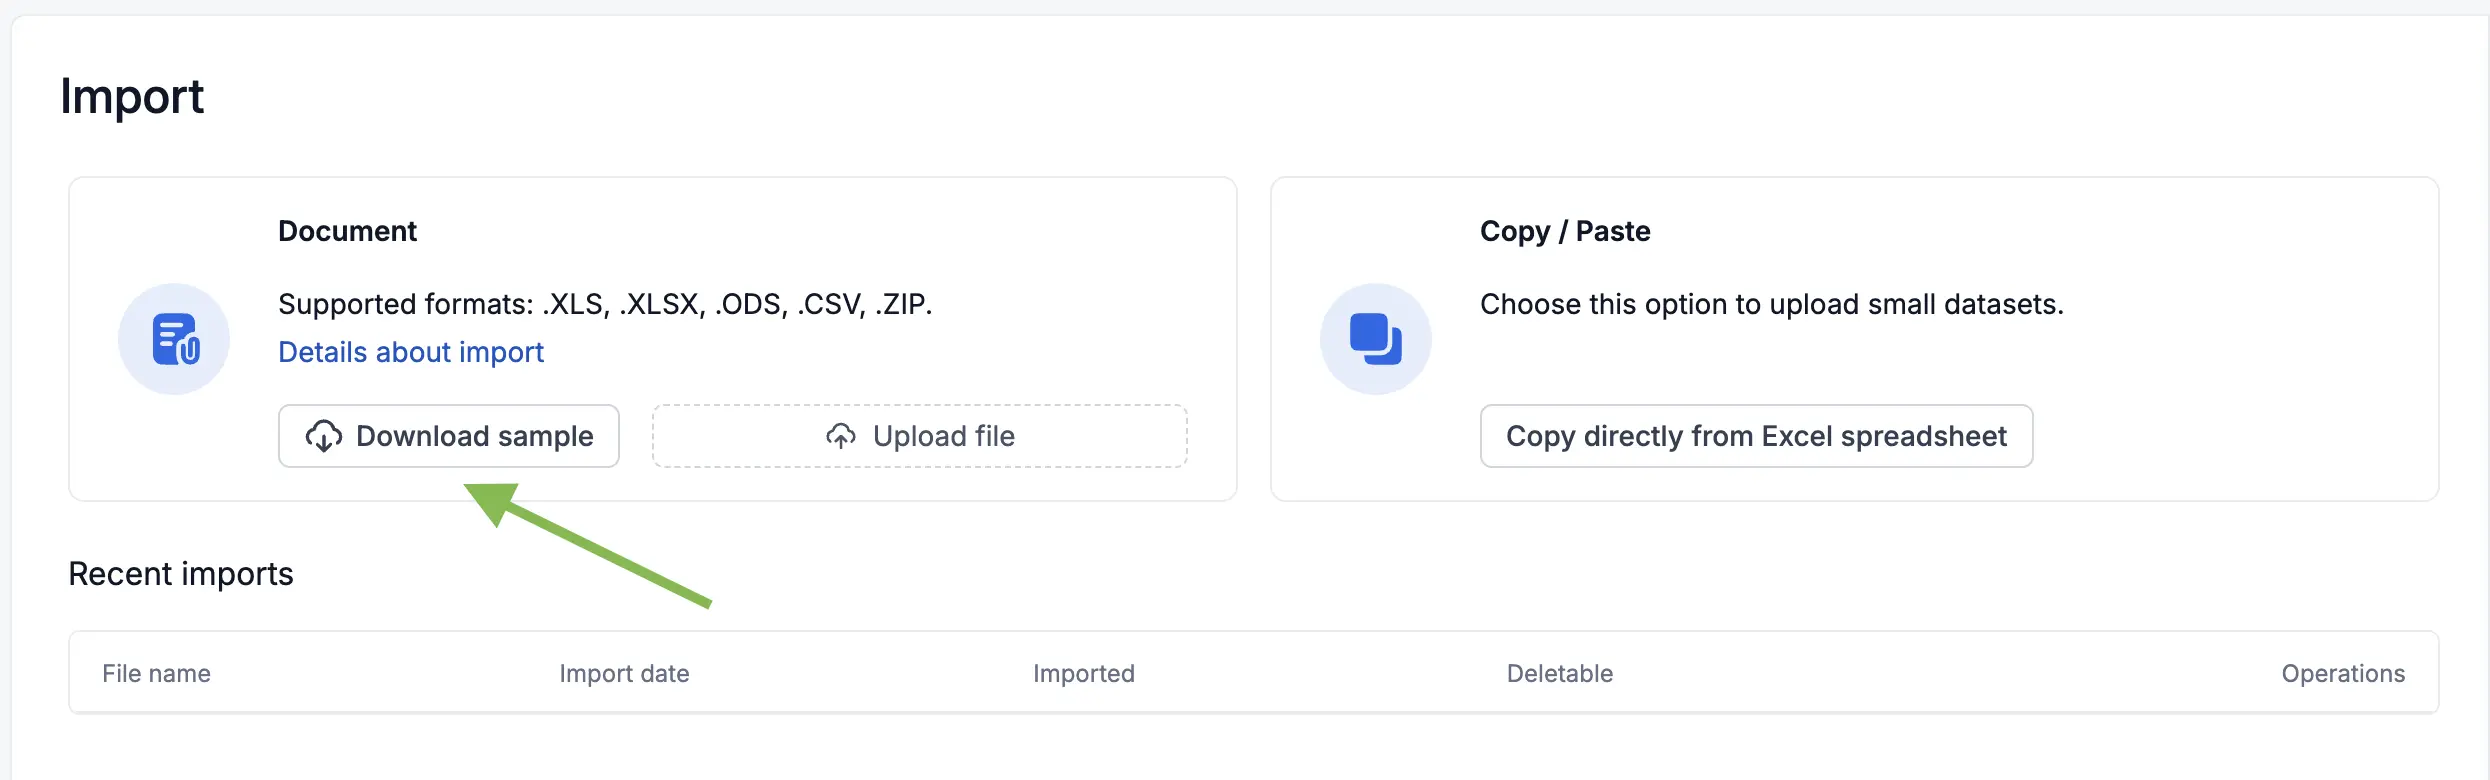
Step 2: Prepare Your Spreadsheet
Keep it simple—names, emails, phone numbers are enough to start.
Step 3: Upload Your File
Click Import from file and select your Excel or CSV. Follow the steps in the wizard.
Step 4: Map Your Fields
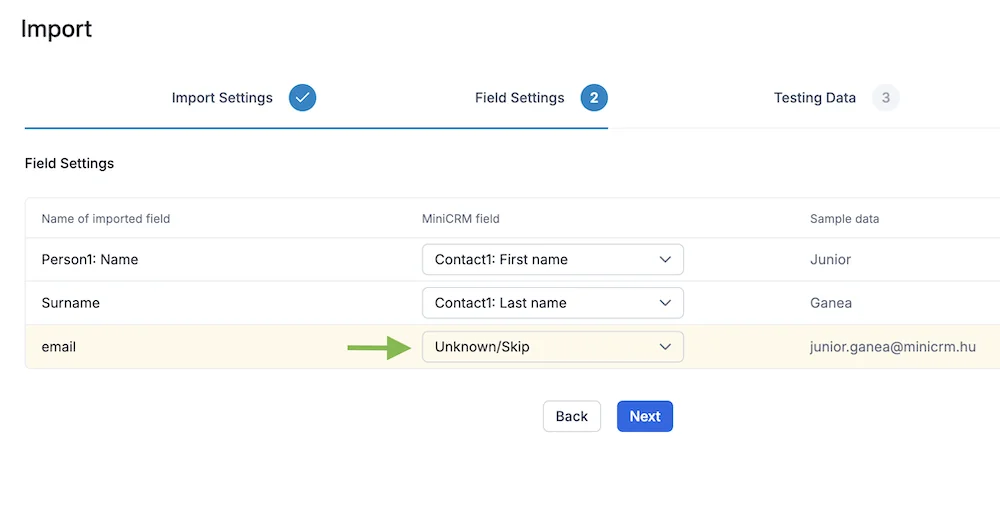
- Match each column to one MiniCRM field.
- Keep it one‑to‑one to avoid errors.
- We’ll highlight anything that needs your attention.
Step 5: Start Your Import
Review, confirm, and let MiniCRM do the work.
You can export and adjust anytime—no risk, no lock‑in. You’re always in control.
Quick Fixes
- Got an error about the same field selected twice? Map each column to a different field.
- File didn’t upload? Check the format (Excel/CSV) and try again.
- Something looks off? Export, fix in Excel, and re‑import. It’s safe and fast.
FULL GUIDE
Import Your Customer Data in Minutes
You can do this, even if you’ve never used a CRM before. No technical skills needed. We’ll guide you through everything.
What You Can Import
- From file: XLS, XLSX, ODS, CSV, or ZIP packages.
- File size limits: up to 4 MB for XLS/XLSX and 8 MB for CSV.
- Prefer pasting? You can also import by copy-paste if that’s easier for you.
Preparing the Spreadsheet
- To create the spreadsheet, generate a data-sheet Excel export from the product into which you want to load the data. (If you have created a new product, add a test data sheet that you can freely delete later.)
- The downloaded Excel header will contain the fields required for a successful import.
- Delete the first column from the spreadsheet. It contains the data-sheet ID, which you won’t need when uploading a new data sheet.
Structure of the Spreadsheet
- The spreadsheet header contains the fields you want to upload into MiniCRM.
- One row represents one client.
- One column contains one piece of data about the client.
- When uploading companies, the Company name is mandatory; when uploading individuals, the Person’s name is mandatory.
Some data must be entered according to the fields’ structure and properties. Character-accurate input is required, taking uppercase and lowercase letters into account.
Let’s Go Step by Step
- Click on the product in the menu into which you want to load data.
- Next to the “New data sheet” button, click the downward arrow, then select Import.
- Use the Click or drag file here button to browse and select your spreadsheet.
- Upload settings.
- If there is no data in your MiniCRM yet, the “Event after identification” field is set correctly by default.
- If you already have data in your MiniCRM, it’s recommended to select the “Modify existing data sheet” option. This helps you avoid duplicates.
- You can define the status that the uploaded data sheets should have. If your spreadsheet already contains a column under the header “Data sheet: Status,” you can skip this step.
- If your database is active and ready, keep the checkbox for “Activate email addresses” selected; otherwise, you can uncheck it.
- Read and accept our SPAM policy, then click Next.
- On the Field settings page, you will see which fields MiniCRM has recognized based on your spreadsheet headers.
Error Handling Example: If you see an error message (e.g., “Person1: First name” is selected twice), it means that the same MiniCRM field has been selected more than once. Therefore, ensure that fields on your data sheets have unique names.
- Click Next.
- If all rows have a white background, it means every column has been successfully identified. Review the headers in the left column and confirm that the corresponding field names in the middle column are correct.
- Test the data.
- By clicking Next, the system performs a test. You can choose to:
- Load error-free rows: Only rows without error messages will be imported.
- Load importable rows: Rows marked with a yellow background will also be imported, BUT the fields containing errors will remain empty on the uploaded data sheets. You can fill these in later.
- By clicking Next, the system performs a test. You can choose to:
- After the import, click on “View uploaded data” to see the records that have been added to your system.
Interruption / Continuation
If you interrupt the import process during any of the first three steps (1. Upload settings – 2. Field settings – 3. Data testing), it will appear on the Load from file page under “Previous uploads.”
You then have two options:
- Click the Interrupt button to permanently close the import.
- Click the Continue button to resume the import process from where you left off.
Congratulations on completing the upload! 🙂
FAQs
- Do I need IT skills? No. You can do this even if you’ve never used a CRM before. We’ll guide you through everything.
- Who can run an import? Administrators can import data into MiniCRM.
- Which file types and sizes are supported? XLS/XLSX (up to 4 MB) and CSV (up to 8 MB), plus ODS and ZIP.
- Can I paste data instead of uploading a file? Yes, there’s a copy‑paste import option if that’s faster for you.
- How do I attach multiple contacts to one company? Use the two‑pass method with a unique customer identifier and VLOOKUP to match contacts to the right records.
- How do regions/states work on import? Always include Country so the system can validate the region properly.
- How do I set visibility on import? Add a “Visibility” column and use “1” for confidential or “0” for visible to everyone.